DNS (Domain name server) is a set of numbers that are assigned by your ISP to connect to the internet. DNS converts your domain name into an IP Address and then connects to your ISP to load pages over the internet.
The Default DNS provides you the less bandwidth area which makes your internet speed limited over the network. But, you can change the default DNS to the Google DNS which will provide you the maximum bandwidth limit.
You will experience a noticeable change in speed after switching your Default DNS to Google DNS. The method I am going to share below might look complicated, but it’s super easy. Here’s how to change Your Default DNS to Google DNS.
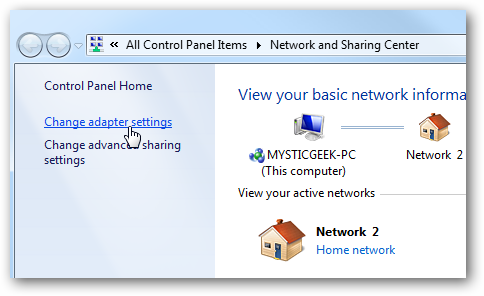
1) Open your windows computer and then go to Control Panel and then select the option Network and Sharing Center
2) Under Network and Sharing Center click on Change Adapter Settings.

Increase Your Internet Speed
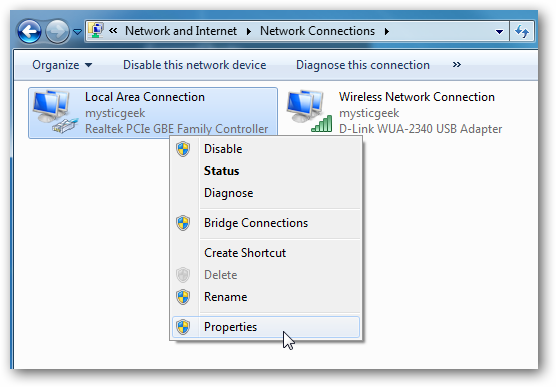
3) Here you will see all your networks, choose the network that you use and then right click on it and then select Properties.

Increase Your Internet Speed
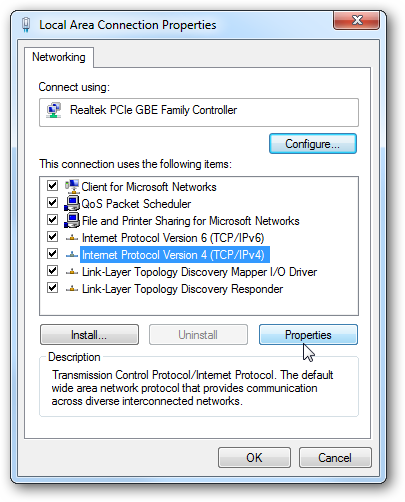
4) Now under networking tab choose the option “Internet Protocol Version 4 (TCP/IPv4)” and then click on Properties.

Increase Your Internet Speed
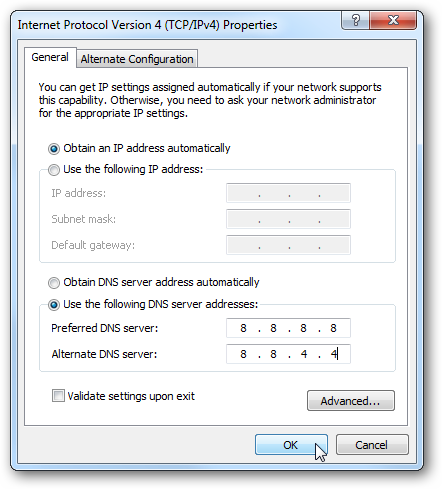
5) Here you need to choose the option “Use The Following DNS server addresses” and under that enter the value of Google DNS that is 8.8.8.8 or 8.8.4.4 and then click on ‘OK’

Increase Your Internet Speed
After setting up all these things, restart the network and start surfing the Internet. You will observe much faster internet speed. If you are not satisfied with the speed, then you can revert back the settings by selecting the option “Obtain DNS server address automatically”


Post a Comment